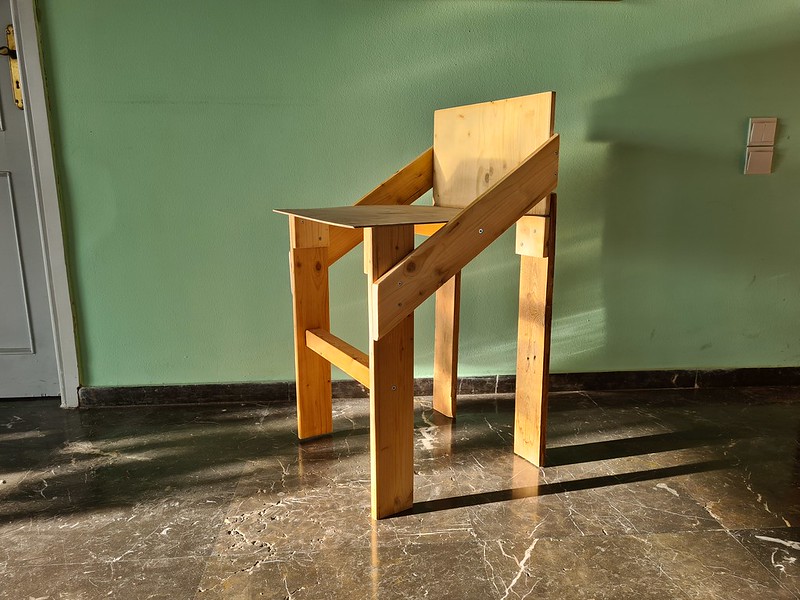
Following my experiments with the ChatGPT-assisted AI Chair 1.0, I’ve been continuing experiments with a range of other LLMs. The below image is Chair 1.1, designed with the assistance of Mistral AI.
Before embarking on this chair, I did some experimenting with local LLMs. These are essentially small “large” language models that you download and run on your own computer. What you gain is transparency, control over resources, privacy etc etc; what you lose, to a quite significant degree, is power and complexity.
I used llamafile from Mozilla, a programme which lets you download small LLMs (filesizes are around 1GB) and tried out two very lightweight models, at the absolute maximum of what I can run on my wheezy secondhand laptop. With very little RAM and no GPU, they can only output a few tokens (~words) a minute, so the process was quite painful. Furthermore, neither were capable of designing a chair.
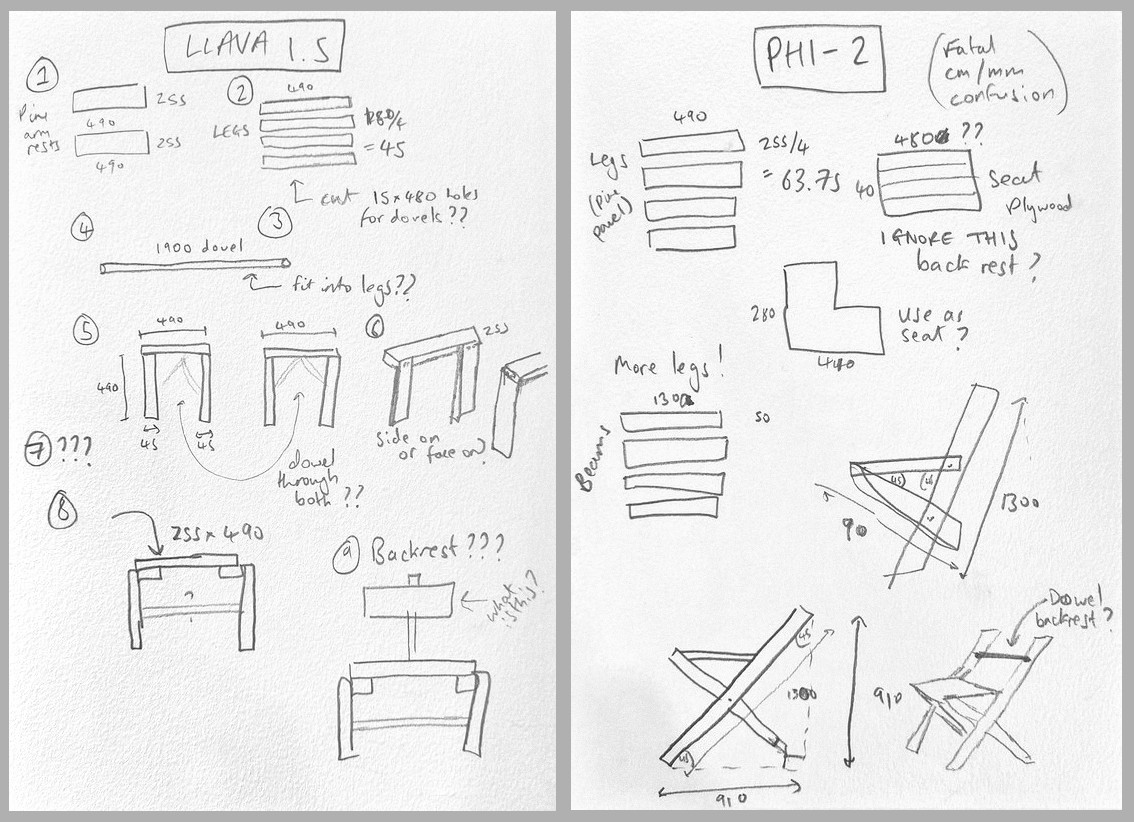
The above are my attempts to sketch out designs for scrap wood chairs based on the instructions from two locally-running LLMs: LLAVA 1.5 and Phi-2 (click those links for full transcripts of our conversations). While I tried to makes sense of what I was given, the above sketches are very creative interpretations of instructions which mostly did not make sense. Confusion over materials, inconsistent referents, and severe difficulties with measurements, resulted in descriptions which sounded like they should make a chair, but really didn’t.
I don’t know how much of this I can blame on the models, or the fact that they were running on a seriously underpowered machine. But I decided if I was going to use up my remaining stock of scrap wood, I would work with a slightly more helpful assistant, so I turned to the ChatGPT competitor, Mistral.
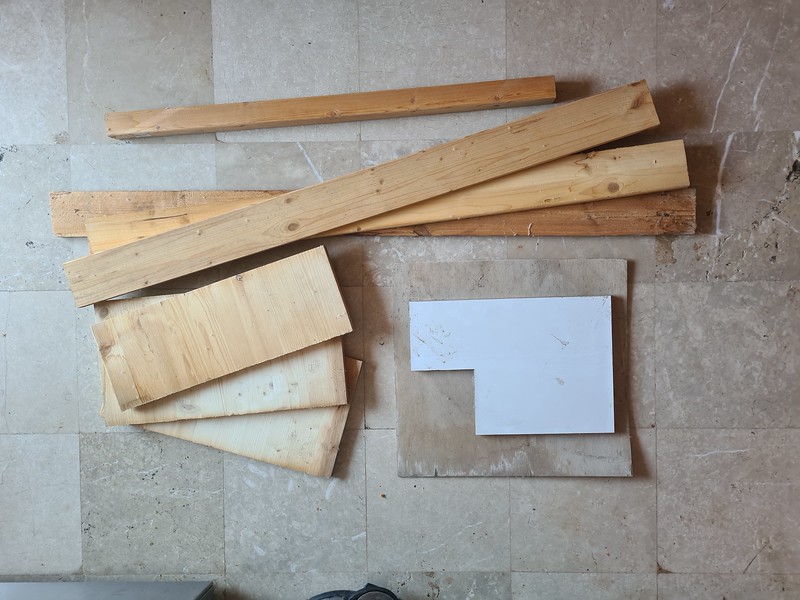
I have a pile of scrap wood and I would like to make a chair. I have a saw, a drill, screws, and wood glue. Please give me step by step instructions for making a chair from the following materials, using as little wood as possible. 3 pine panels: – 18, 180, 490 mm – 18, 255, 490 mm – 18, 255, 490mm 1 plywood sheet: – 4, 480, 455 mm 1 L-shaped laminated chipboard sheet: – 15, 280, 410 mm (missing 130, 135 mm cutout) 3 planks – 20, 95, 1300 mm – 20, 95, 1200 mm – 20, 95, 1200 mm 1 wood beam – 50, 50, 895 mm
Sure, I’d be happy to help you create a simple chair using the materials you have. Please note that the design will be basic due to the limited materials and tools. Here’s a step-by-step guide:
Materials:
• Pine panels: A (18, 180, 490 mm), B (18, 255, 490 mm), C (18, 255, 490 mm)
• Plywood sheet: D (4, 480, 455 mm)
• L-shaped laminated chipboard sheet: E (15, 280, 410 mm)
• Planks: F (20, 95, 1300 mm), G (20, 95, 1200 mm), H (20, 95, 1200 mm)
• Wood beam: I (50, 50, 895 mm)
Tools:
• Saw
• Drill
• Screws
• Wood glue
Steps:
1. Backrest and Seat:
– Use pine panel A (18, 180, 490 mm) as the backrest.
– Use the plywood sheet D (4, 480, 455 mm) as the seat.
2. Back Legs:
– Cut plank F (20, 95, 1300 mm) into two equal pieces (20, 95, 650 mm) for the back legs.
3. Front Legs:
– Use plank G (20, 95, 1200 mm) and cut it into two equal pieces (20, 95, 600 mm) for the front legs.
4. Armrests:
– Use plank H (20, 95, 1200 mm) for the armrests. Cut it into two pieces, one of 20, 95, 500 mm and the other of 20, 95, 700 mm. The longer piece will be the back armrest, and the shorter one will be the front armrest.
5. Support Beam:
– Use the wood beam I (50, 50, 895 mm) as a support beam between the front legs.
6. Assembly:
– Attach the backrest (A) to the top of the back legs.
– Attach the seat (D) to the top of the front legs and the bottom of the back legs.
– Attach the back armrest to the top of the backrest and the back legs.
– Attach the front armrest to the front legs.
– Attach the support beam (I) between the front legs for added stability.
– Use the L-shaped laminated chipboard sheet (E) as additional support. Attach it to the back of the seat and the backrest.
Remember to pre-drill all your holes to prevent the wood from splitting. Also, use wood glue in addition to screws for extra strength.
Please be aware that this design is quite basic and may not be as comfortable or as sturdy as a professionally made chair. Always ensure your safety when using tools and handling materials.
Good luck with your project!
This seemed like a pretty do-able set of instructions, although I had doubts about some of the aspects, so I went ahead and built it. There was a bit more back-and-forth about how to attach the seat (the above makes no sense), the seat’s orientation, and various connections. Read the full transcript here. Mistral is very apologetic, but I’d also been told it was more technically accurate than ChatGPT and less likely to make stuff up, so let’s go.
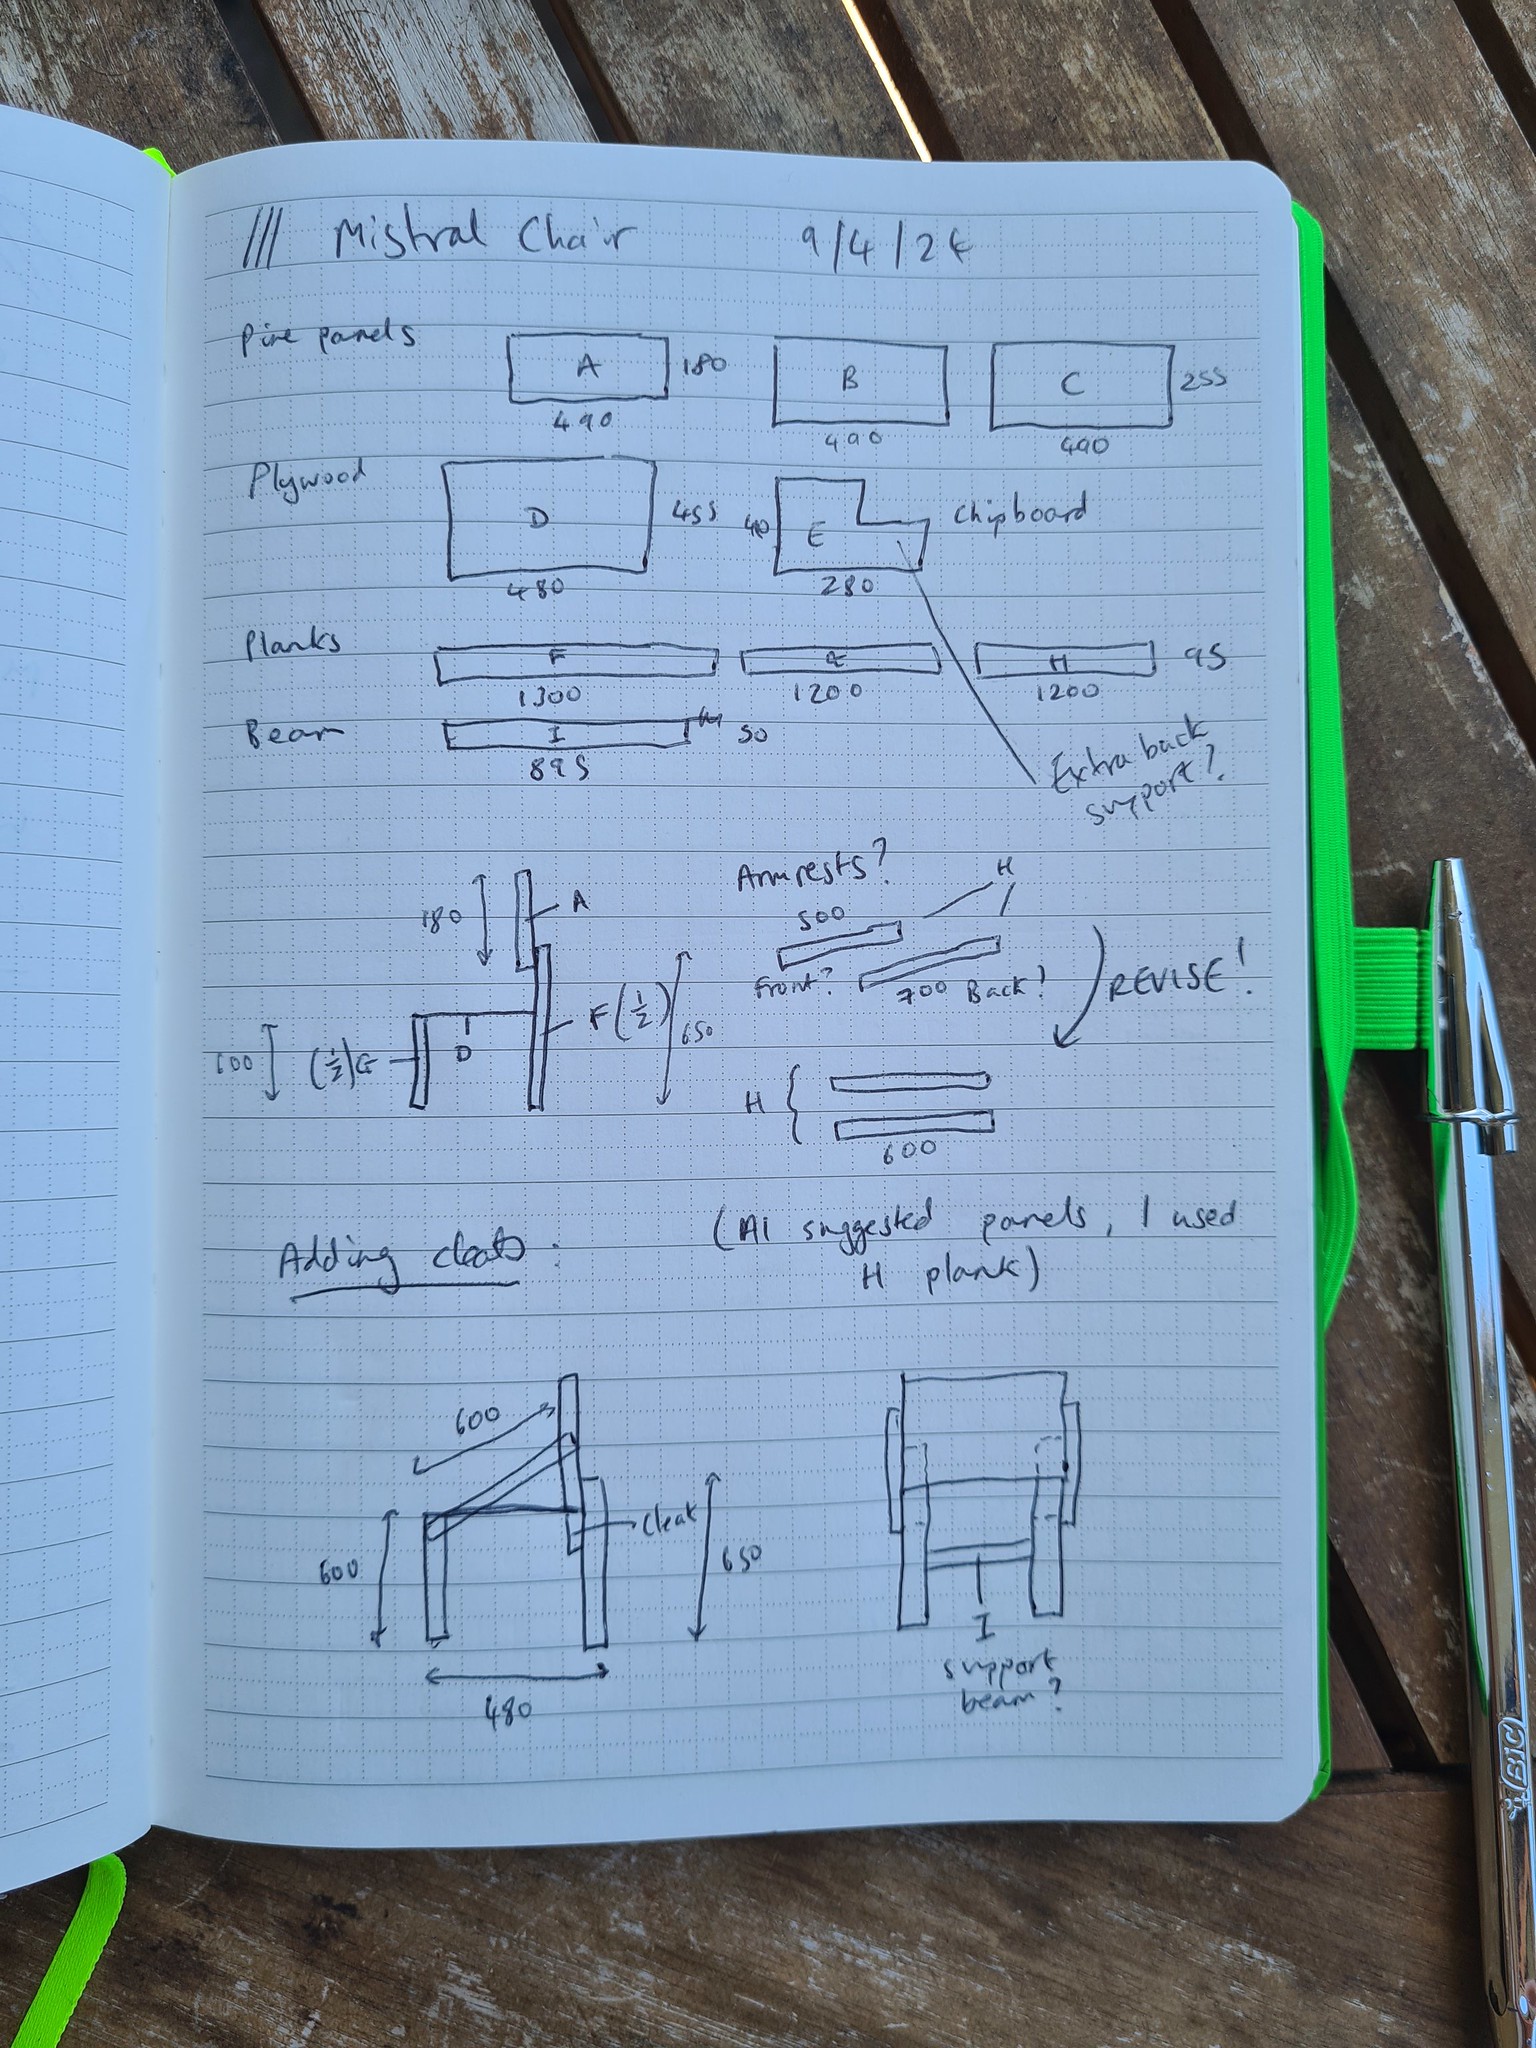
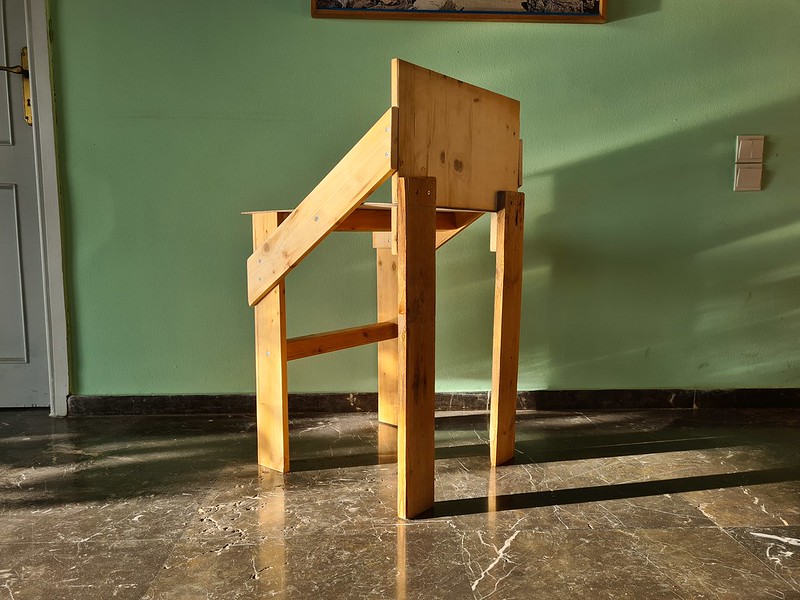
There were two major changes to Mistral’s first design, one of which I prompted directly, and the other I did without discussing it. The first is that it was very obvious that the seat as described had no way of attaching to the legs, and there was no way of adapting the design as given without using more wood. Challenged on this, Mistral advised adding cleats to the back legs to support the chair. I interpreted this in the way you see in the chair: adding additional blocks to the legs to widen them and provide a secure base for the seat. I did this to the front legs too, which Mistral didn’t ask for, but was very obviously necessary (and still insufficient; see below). As an aside, this produced a detail which I absolutely love, where the rear of the seat is very neatly sandwiched between the rear leg cleats and the backrest.
Secondly, Mistral suggested armrests, but it was very unclear where these went or how they were attached. As the original instructions included bracing between the front legs, but left the front-back axis supported only by the 4mm ply seat (again: no), I decided to use these pieces as semi-armrests, semi-braces, as you see in the final design. I like this: a design element I would not have come up with without having to solve a structural problem posed by, and constrained by, my collaborator’s instructions.
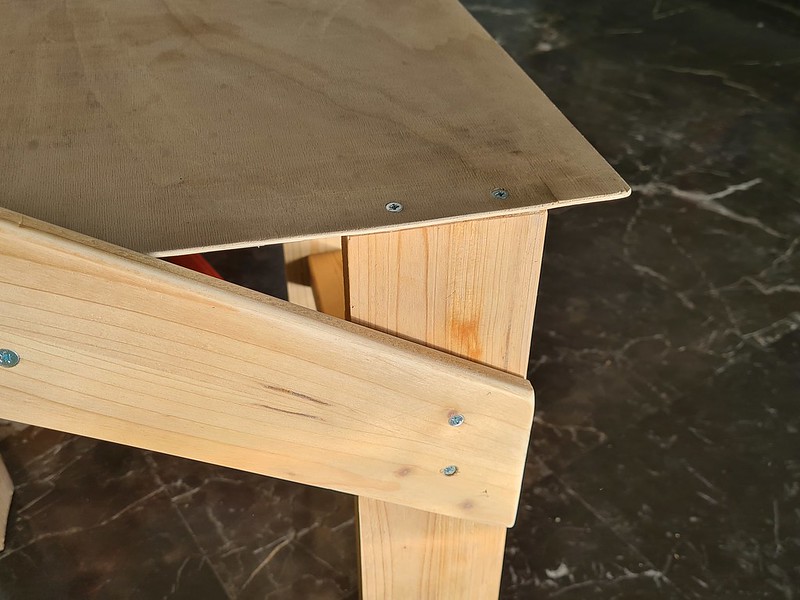
Mistral advised me to use the incredibly thin plywood sheet as a seat again, just as ChatGPT did. However, in this case it over-reached. It said the seat should “overhang the front legs slightly”, which when combined with the other measurements it provided, resulted in the above. This cracked as soon as I sat on it. To prevent this crack getting a lot worse, I had to add an additional beam support underneath the seat – although this actually worked really well, both aesthetically as it connected the armrests nicely, and structurally to stabilise the chair.
(A reminder when looking at these photos: I am building these chairs quickly, with very poor tools, out of materials which have been sitting in the rain and sun for months/years. Do not judge my joinery.)
Here’s the other major problem with the design as given:

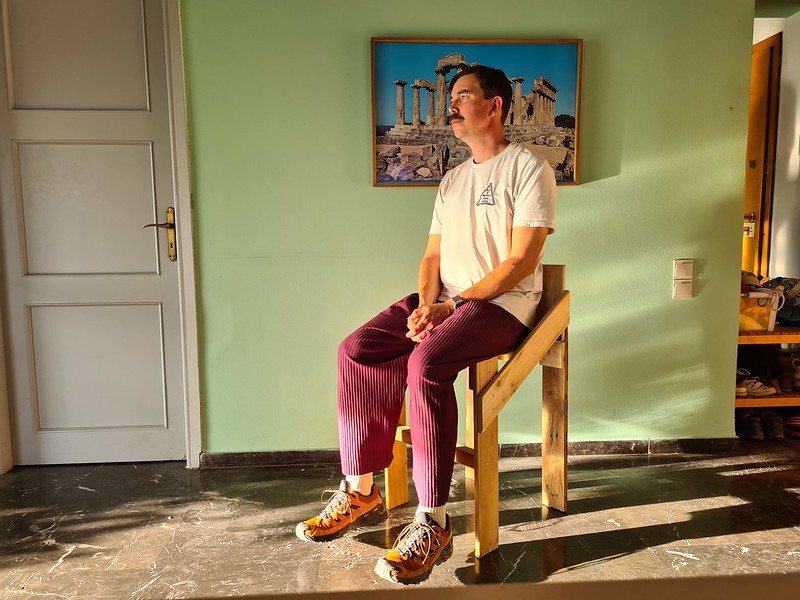
I am 6’0 (182cm) tall, but even my feet don’t touch the ground. Now, the ChatGPT chair was weirdly large, but kind of comfortingly so, like an outsized child’s chair. Mistral went even bigger, specifying legs which are 60cm long. This is too long.
Of course, I could see this coming, and in a true collaboration I would have simply adjusted the height, and I nearly did this. But since I am still in the prototyping phase, I decided to let it stand, as it makes for a good point of comparison with other collaborators, for now. As I said, Mistral was supposed to be more technically precise, and concise, than ChatGPT, but from this experience it seems slightly less capable with materials and human dimensions. The various changes prompted or needed – adding cleats, shortening the legs – also made for much less efficient use of materials than the first pass.
On the other hand, apart from the material efficiency issue (which does matter), those adaptations are my job: Mistral made a way more interesting chair. The inclusion of armrests-turned-braces and the low backrest led to something that’s much closer to a ‘designer’ chair than ChatGPT’s oversized doll’s chair, even in this very rough prototype version.
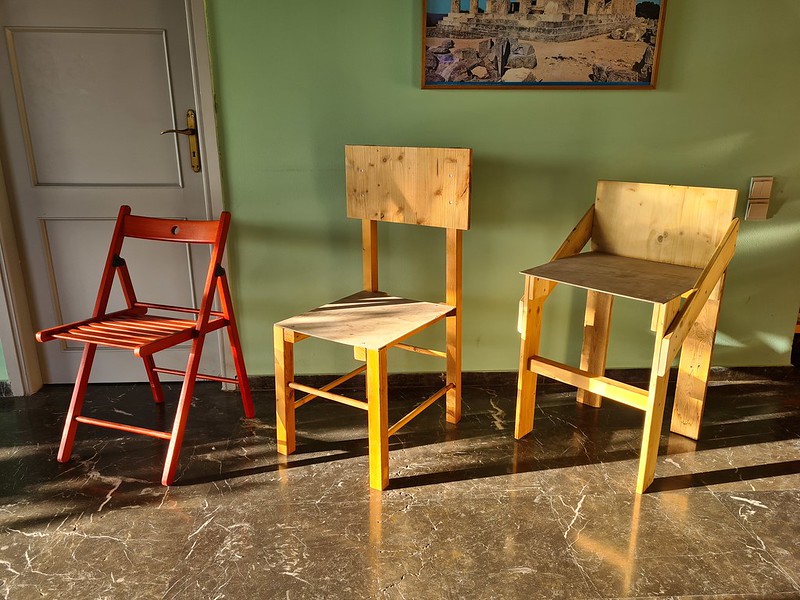
Finally, for comparison, here’s where we are now: from left to right, the FRÖSVI folding chair by IKEA, the AI Chair 1.0 by ChatGPT and me, and the AI (High?) Chair 1.1 by Mistral and me:
Am I annoyed that I started making chairs, rather than simpler, elongated stools, so that I could have made a BENCHMARKING joke? Yes I am. But if any other AI developers want to give me access to their paid / geo-locked products (Anthropic, I’m looking at you there), I’d be happy to discuss BENCHMARKING your product too.
(Go read the history of benchmarks now. It has nothing to do with furniture, but it’s very nice.)
Comments are closed. Feel free to email if you have something to say, or leave a trackback from your own site.